AI WATERING
WIFI Setting & IoT Cloud data storage
Compatible with all devices Android , iOS , MAC , Windows & Linux
By ideaRipple

WIFI Remote Control & Soil Historical Records (IOT Cloud)
AI WATERING CONTROLLER can be remote control via the internet with Android, iPhone, PC, Linux, MAC, and other devices.
We also provide free IoT services for our clients.
Now, let's complete the relevant settings step by step.
Apply IoT Cloud account
Please use a computer to sign up your IoT account, click sign up here
After registration, the system will send a confirmation letter to your email account, and please follow the instruction in the letter to activate your account.
After above steps, you can log in to the system, and start to build your IoT channel.
build your Channel
After logging into the system, first you need to build a new channel.
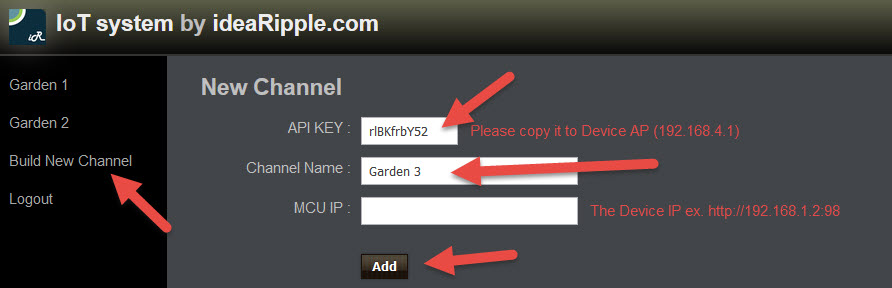
Fig.0
Define a channel name here. MCU IP can be left blank now. It will be entered later when you obtain it from the device.
Copy this API KEY (ex. rlBKfrbY52 ) down, and you will need this later.
WIFI settings
Set up a WIFI password for AI WATERING:
Turn on the controller then use your computer's wireless network to find "iR_xxxxxx" WIFI device (Fig.1) and connect it.
You will need the password which is 1abcd234。
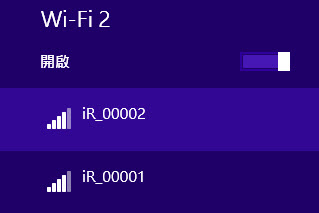
Fig.1
After confirming that it is connected, please open any browser on your computer and enter the URL "http://192.168.4.1"
Then, you should see a page showing "Please setup WIFI" (Fig.2), which means that you have connected to the AI Smart Watering Controller (AP MODE).
Now you can start setting up a password for your WIFI wireless network to AI WATERING.
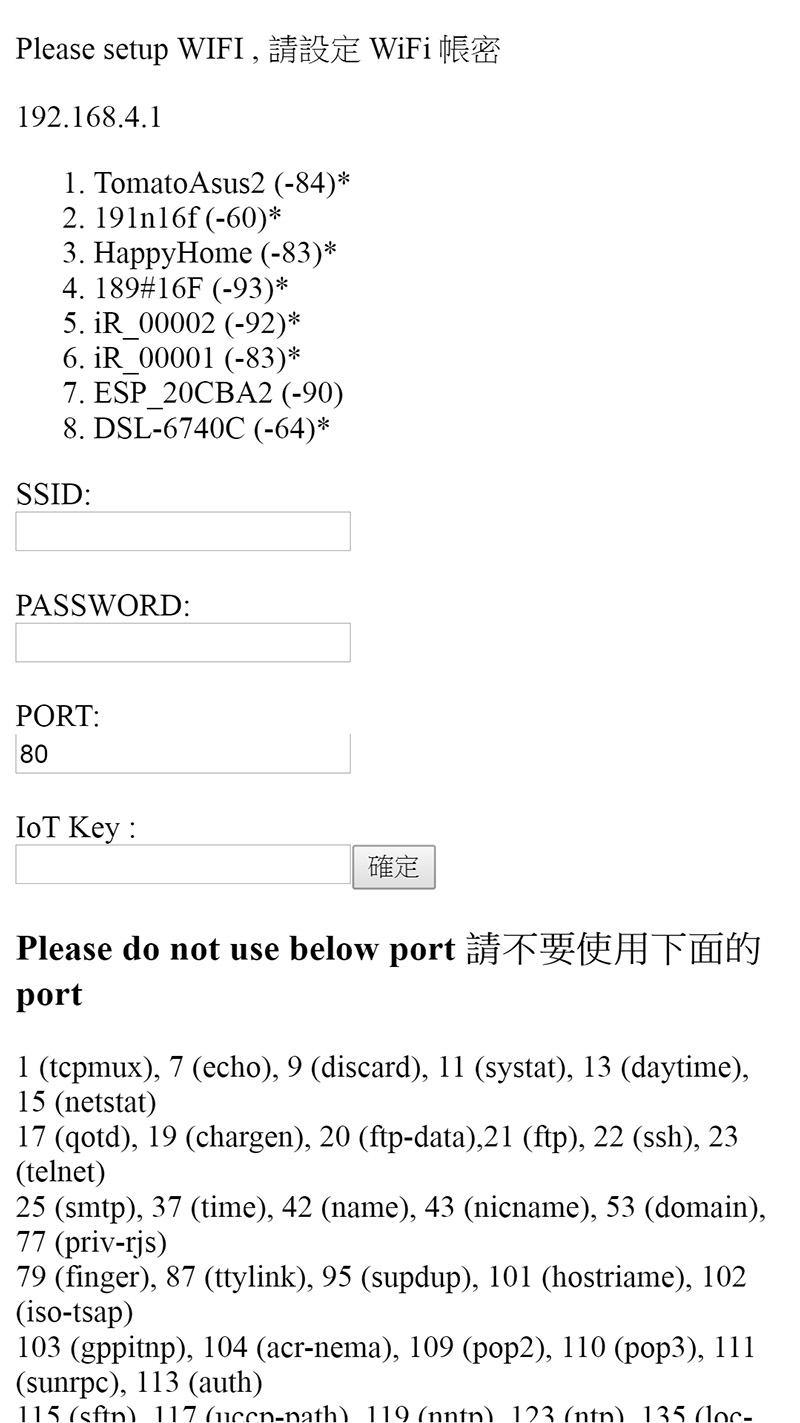
Fig.2
Set up your WIFI password to controller
1. SSID is the wireless network name of your wireless router; please make sure it is on the list.
2. PASSWORD is the password of your wireless router. Enter it in the password field.
3. PORT is the port you expect to use. If there is no other requirement or no external line connection is required, keep it as 80.
4. Enter the API KEY that you obtain at step "BUILD YOUR CHANNEL"
Note: Do not use the Reserved port.
Once set, you must restart your AI WATERING, unplug and re-plug the power supply or press Reset.
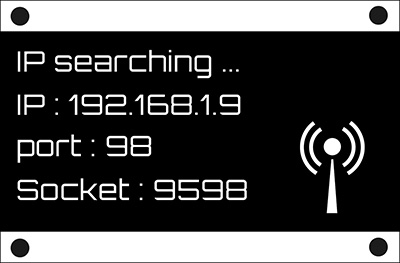
Fig.3
ex. IP:192.168.1.9 , port:98
AI Watering is working at IP 192.168.1.9 and port : 98 (Fig.3).
Now, enter http://192.168.1.9:98 in any browser address bar ex. Chrome, FireFox. You will see the controller's screen in the browser (Fig. 4).
Note:
If you see the OLED display SoftAP 192.169.4.1 then it is not connected successfully. Please confirm the WIFI password and repeat the above steps.
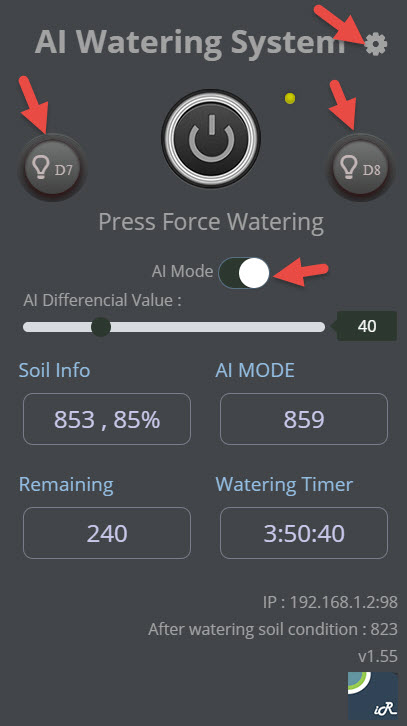
Fig.4
You can use the corresponding IP: port (ex.http://192.168.1.9:98) in any browser.
Don't forget to copy the controller IP: port (ex. http://192.168.1.9:98) to the MCU IP of the IoT Channel.
Ref. "Build your Channel"
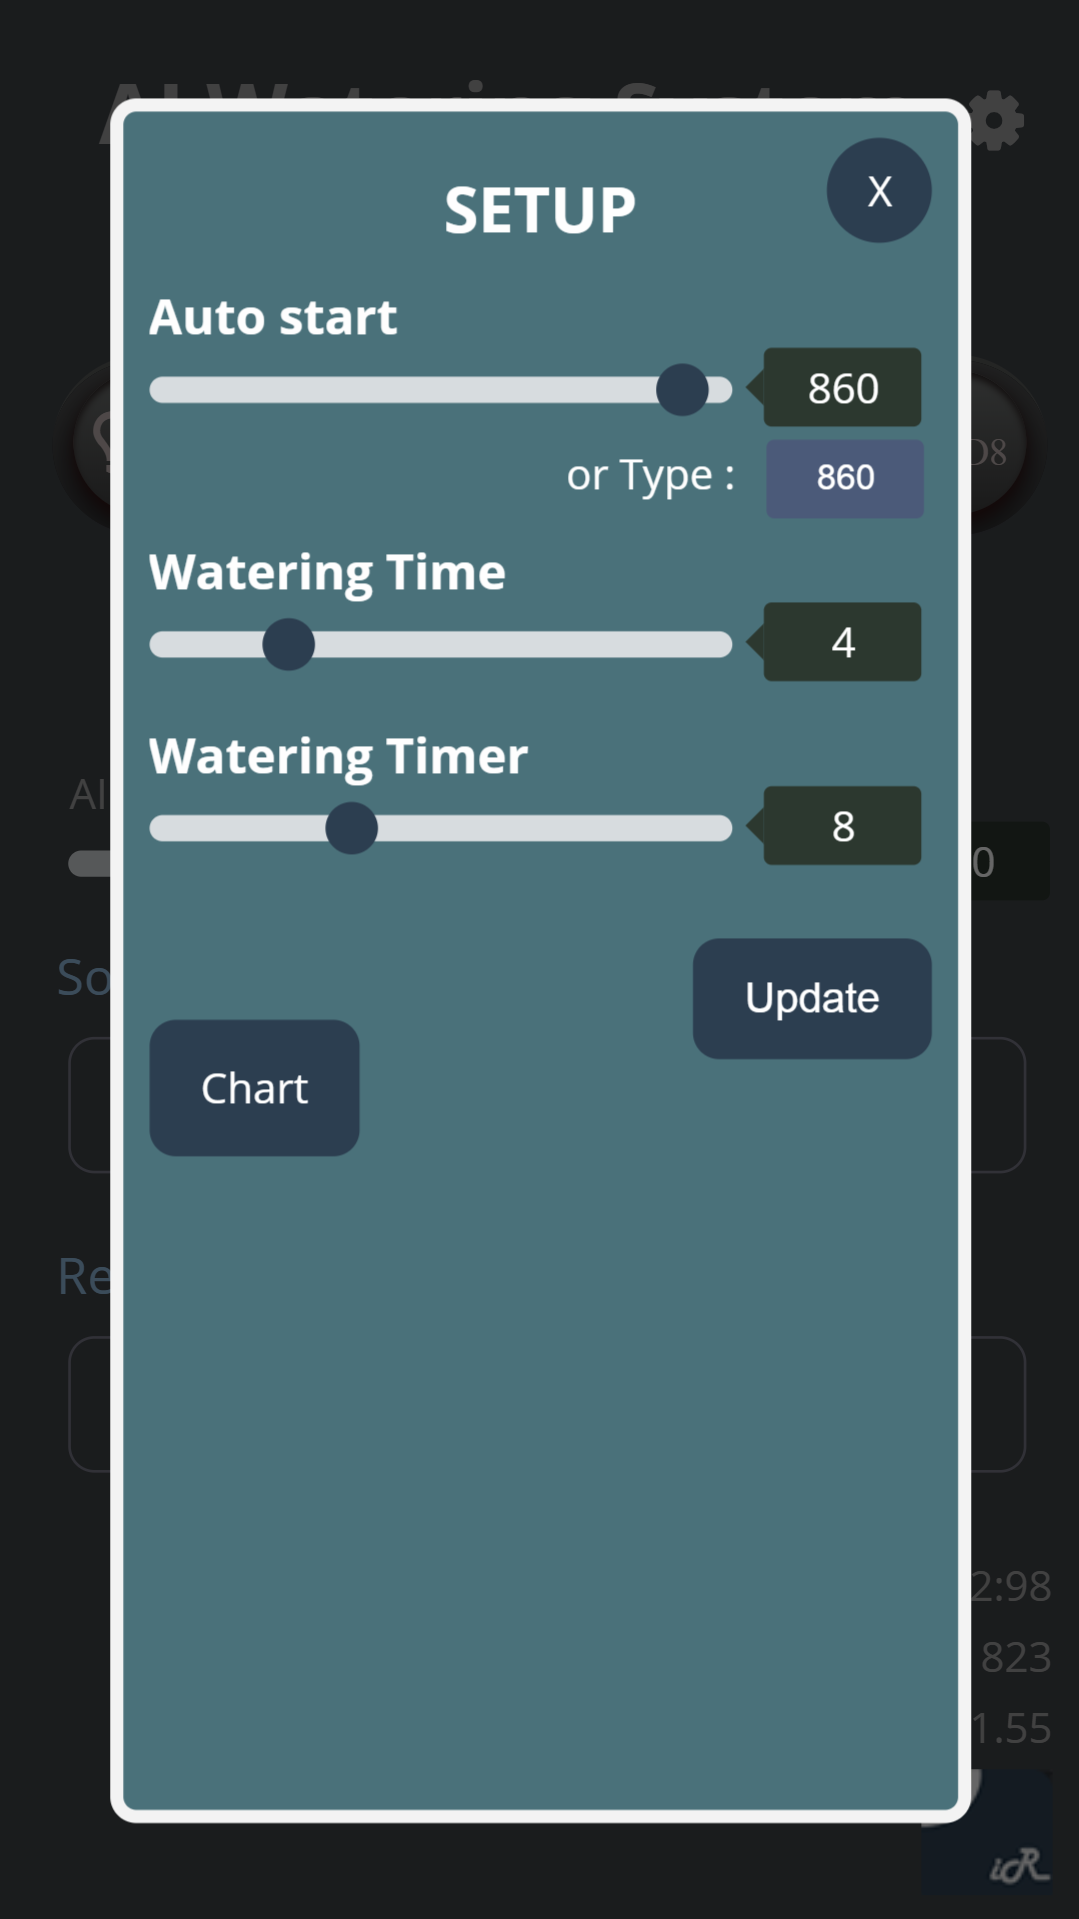
setting
There is a setting button in the upper right corner. After clicking in, you can set the relevant data.
D7 , D8 on/off
D7&D8 is an extra function. You can see that the LED on the AI WATERING will turn on and off. If you connect the corresponding relay switch on the device, you can turn the remote control device on and off.
If you need assistance in setting up D7 & D8 function, please feel free to contact us.
AI Mode
When the AI mode is turned on, the system will automatically remember the soil value after irrigation and uses the differential value set by you as the next watering start data.
Note:
AI mode only can be set up via the WIFI interface.
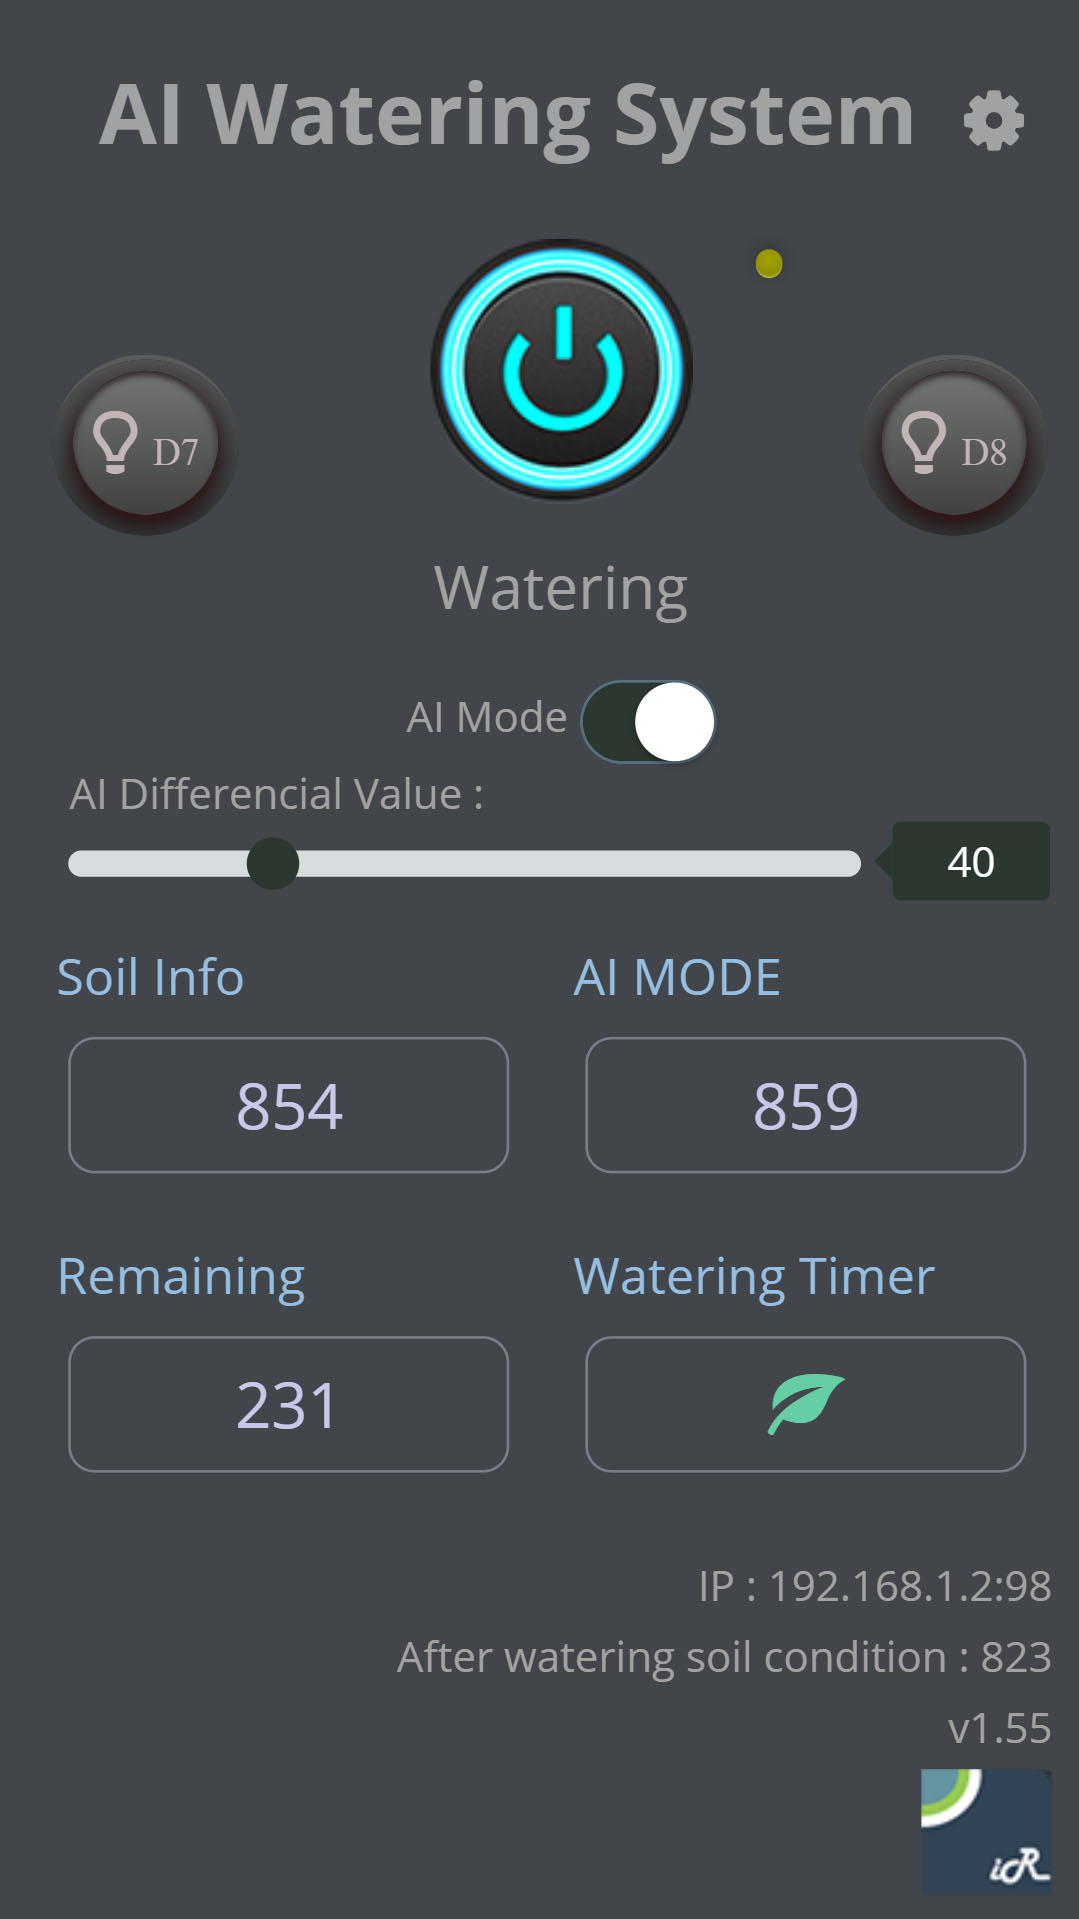
Fig.5
Note:
Soil monitoring based on conductivity, not soil moisture, therefore if you water the flowers with Pure Water, there will be very low conductivity.
Both water quality and soil composition will affect the conductivity measurement. We recommend that the AI or automatic mode be used in conjunction with the timer mode to ensure actual irrigation and avoid accidents like insufficient water or no watering.
After each automatic watering, there will be 2 hours of automatic protection to prevent repeated watering during a short period.
(The protection mode does not limit manual watering. You can water the flower any time once you press the forced watering button)
Note: After using soil sensing probes for some time, the water scale might build-up to affect the conductivity of them. Please brush and clean probes to maintain the best conductivity.
*** ideaRipple is not responsible for the health of your plants. Please take care of your plants as usual after using the AI WATERING CONTROLLER.
IoT soil records
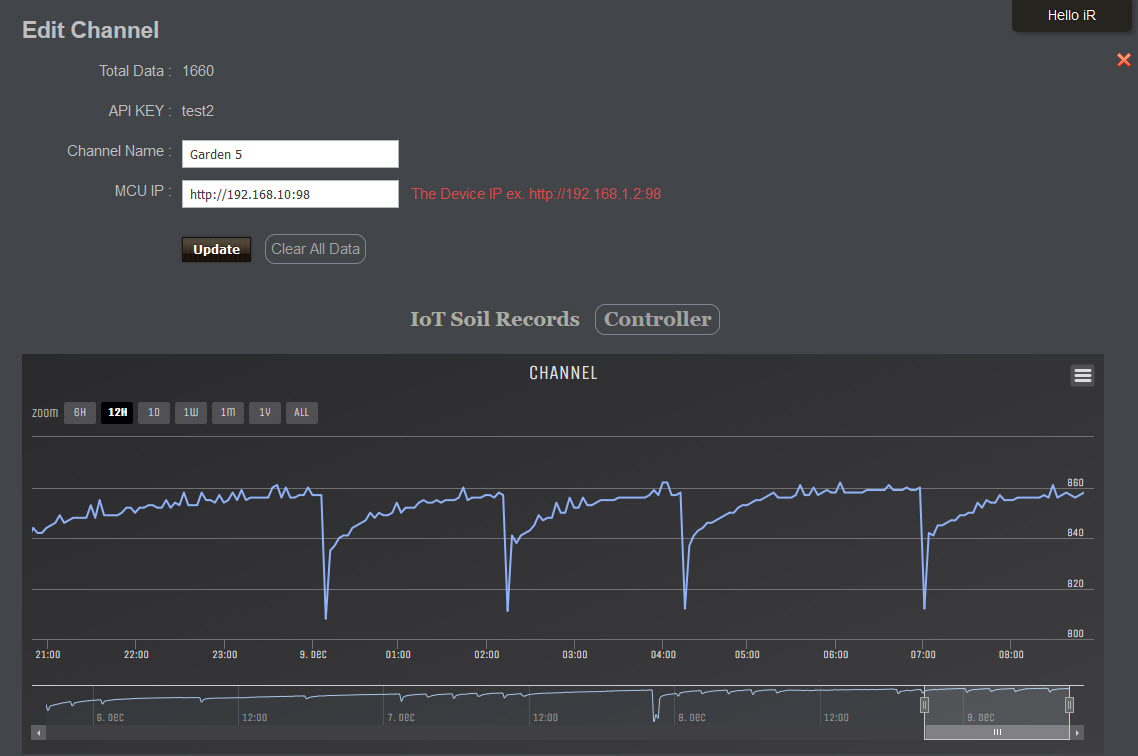
After completing all the above settings, you can go to IoT to open your channel and see the soil history record.
Connect to AI WATERING from the Internet
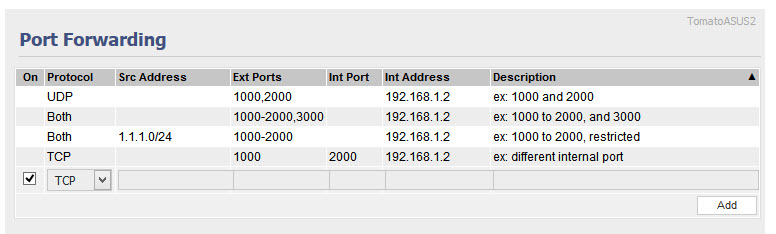
Fig.6
If you need to remote control the device from outside, you must have a fixed external IP (please consult your Internet provider for a fixed external IP)
Then go to the router Port Forwarding (Fig.6) to open the corresponding internal IP, PORT and Socket port (9598).
Once opened, you can connect to the AI WATERING Controller from the outside.
If you need a different WebSocket port, please let us know before your purchase.
Reboot by WIFI
You can restart your device via WIFI, by adding "/softRestart" to your IP.
Ex. http://192.168.1.2:98/softRestart
Reset WIFI password
You can reset the WIFI account password, by adding "/resetwifi" to your IP.
Ex. http://192.168.1.2:98/resetwifi
If you relocate the device to no/new IP environment, you can use your computer WIFI to connect the controller,
and then use AP address to reset the password.
Ex. http://192.168.4.1:98/resetwifi
After reset, please restart the system, the system will return to AP Mode, please follow the above steps to reset the WIFI password.
PS: the port number "98", it depends on your setting.